
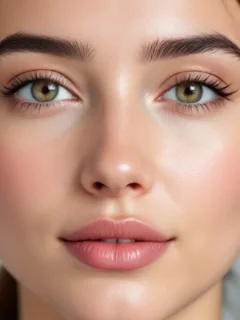

Eyeliner for almond eyes: why most shapes work
Eyeliner for almond eyes is less about correcting and more about choosing. An almond opening is longer than it is tall and narrows toward both corners, so the upper lash line already makes the shape most liner tutorials try to create: a long curve with a taper at the end. A line that follows it looks finished with very little effort.
That leaves the decision of what to change. The four eyeliner styles for almond eyes drawn above keep the same thin base line along the upper lashes and alter one thing each. The small flick changes nothing and simply defines the eye. The wing adds length. The thicker center adds height and makes the eye read rounder. The outer-third line leaves the inner corner open, which makes the eyes look a little farther apart. Knowing which effect you want is most of the work, and it is the same whether you call it eyeliner for almond shaped eyes or just everyday liner.
Winged eyeliner for almond eyes, step by step
A wing is the shape people ask about most, and almond eyes take it easily because the outer corner already points the way.
- Draw the base line. Use short strokes along the upper lashes, as close to the roots as you can, and keep the line thin.
- Find the angle with your eyes open. Looking straight into the mirror, imagine your lower lash line continuing past the outer corner toward the end of your brow. The wing lies on that path.
- Mark the tip. Put a small dot where you want the wing to end. Start short; you can always add length.
- Join the dot to the outer corner, then draw a second stroke from the dot back to the upper line, landing above the outer third of the eye.
- Fill the small triangle and check both eyes together, open and relaxed.
Two things go wrong most often. A wing drawn with the eye closed or the lid stretched changes shape when the eye opens, so always check it open. And a wing that follows the upper lash line downward, instead of the lower lash line upward, ends up pointing at the cheek.
A thin line with a small flick
This is the everyday version, and the one the result on this page suggests first for an almond opening. Keep the line no thicker than the lash roots, and end it in a flick two or three millimeters long that continues the corner. With a pencil or a soft brush it takes under a minute, and it reads as definition, not as a drawn shape.
If you tightline, meaning you color the upper waterline under the lashes, do that first and then decide whether the thin line is needed at all. On a narrow opening, a heavy line can take up a good part of the visible lid.
A rounder look: thicker at the center
To make an almond eye read taller, build the line up over the middle of the eye, directly above the iris, and let it thin out toward both corners. Skip the flick. Paired with mascara that is heaviest on the center lashes, the opening looks more open and round. This is the reverse of the usual advice for a round opening, where liner is kept thin at the center to add length; the round eyes page covers that case.
Outer third only, and other adjustments
Lining only the outer third, starting above the outer edge of the iris, keeps the inner corner light and open. It suits a quick daytime look, and it is the shape to pick when your result also reads close-set, because nothing dark sits near the nose.
Other labels shift the line in their own way. With upturned corners, keep the flick short and nearly level and add a little shadow under the outer lower lashes. With downturned corners, begin the flick just before the lash line drops and angle it slightly up, leaving the outer lower lash line bare. With wide-set eyes, take the liner all the way into the inner corner. The pages for upturned eyes, downturned eyes, close-set eyes and wide-set eyes explain each label and how it is measured.
Pencil, gel or liquid?
The tool matters less than the shape, but each one behaves differently. A pencil is the most forgiving and smudges into a soft line, which suits the thin line and the outer-third shape. Gel applied with a small angled brush gives control over thickness and is the easiest way to build a thicker center. Liquid with a fine tip draws the sharpest wing and is the hardest to fix, so mark the tip of the wing with a dot before committing.
Whatever you use, work in short strokes and join them, instead of trying to draw the line in one pass. Rest your elbow on a table and your little finger on your cheek to steady your hand. That is how to apply eyeliner on almond eyes without a wobble, whichever of the four shapes you choose.
Check that your eyes are almond first
All of this assumes an almond opening, and eyeliner for almond eyes will not behave the same way on a taller one. The scanner on this page measures it: eye height divided by eye width, read from one selfie in your browser. Under 0.30 reads as almond and 0.30 or more as round, and the result also gives the tilt of the corner line and the spacing between the eyes, which decide the adjustments above. The photo stays on your device.
If you are not sure what the labels mean, the almond eyes page explains the shape and how to check it in a mirror, and the eye shape detector page covers every label together.
Updated 2026-10-06